Reference
Get acquainted with Inkdrop interface

Get acquainted with Inkdrop interface
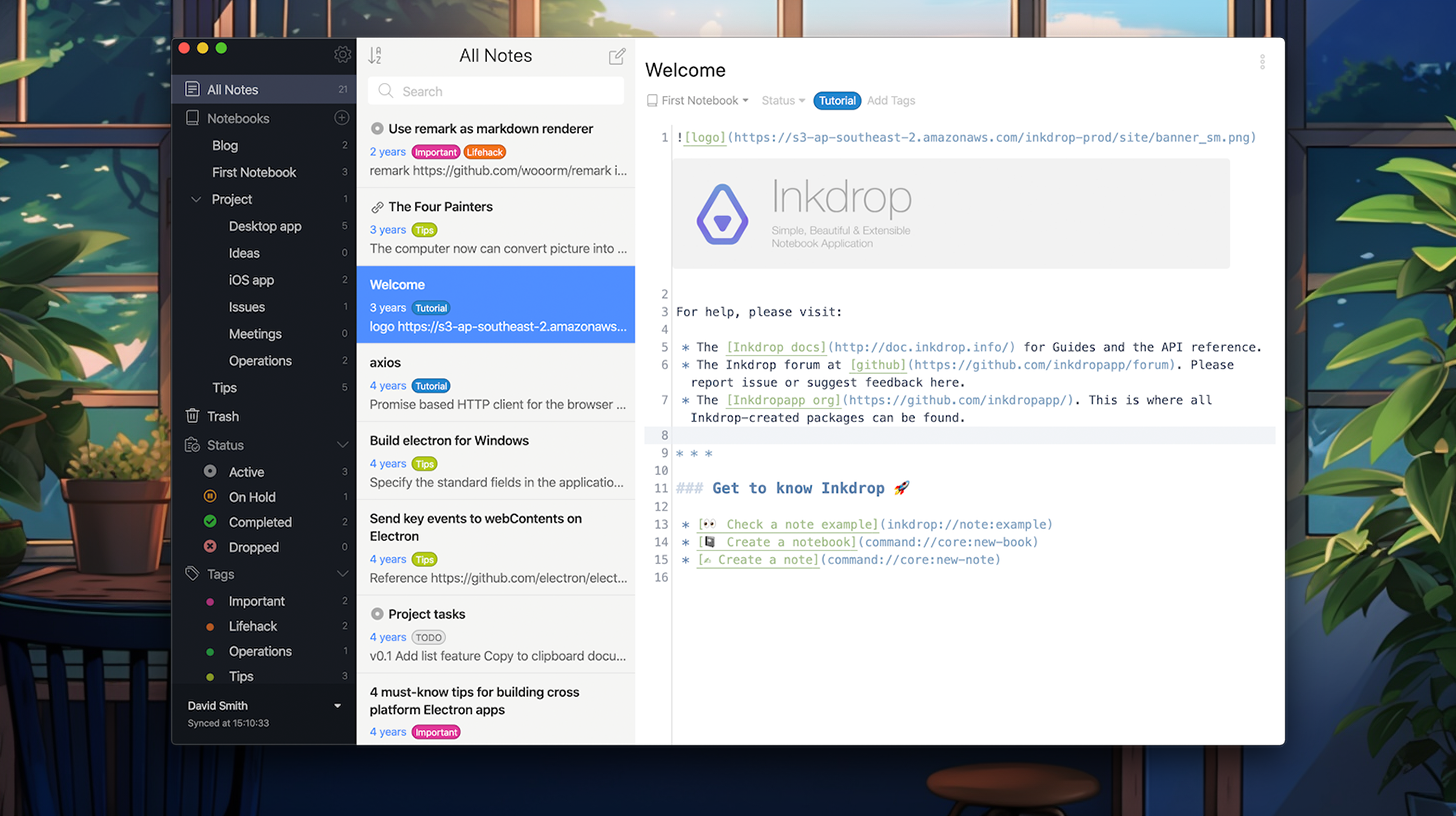
Inkdrop interface is broken up into 3 main sections.
- Sidebar is the leftmost section. It lists notebooks, statuses, and tags.
- Notebooks are like folders that store your notes. You can nest notebooks in one another as deeply as needed.
- Statuses help you treat notes as tasks and, for example, display only active or completed ones.
- Tags are like labels that let you link notes with one another. For example, if they relate to a common topic. You can toggle the Sidebar by using Command+/ or Ctrl+/ on Windows/Linux.
- Note list is located amid. All your notes live here ordered by modification date by default. You can search for notes via the search box at the very top of the section.
- Editor is the rightmost section. This is where your magic happens 🪄 — your workspace.
More useful shortcuts:
- Command+E or Ctrl+E — to switch between the editor and preview modes.
- Command+P or Ctrl+P — to display the editor and preview side-by-side.
- Command+Shift+D or Ctrl+Shift+D — to enter/leave the 'Distraction Free Mode' 🧘 Is when the sidebar and note list are hidden, and you can focus on the writing process.
Create new note and notebook
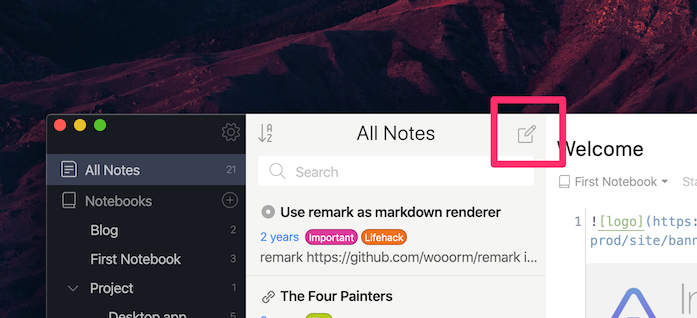
To create a new note, you can either click the icon on the right top of the note list or use the Command+N / Ctrl+N shortcut. The newly created note will appear in the Note list section.

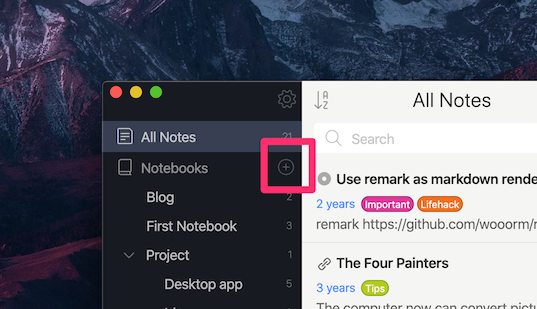
To create a new notebook:
- Click next to Notebooks.

To create a sub-notebook:
- Right-click the notebook and select New Sub Notebook...
- Enter a title for the sub-notebook.
- Click Create.
The newly created sub-notebook appears inside the selected notebook.
Browse viewed notes
As you view your notes, Inkdrop remembers in what order you opened them. It lets you go through the history of the viewed notes back and forth.
There're several options to see the viewed notes:
Via keyboard
| macOS | Windows/Linux | Action |
|---|---|---|
| Command + ← | Alt + ← | Go to previous note |
| Command + → | Alt + → | Go to next note |
Via application menu
To navigate between notes via the app menu:
- Click View and then select Back or Forward.
Via mouse buttons
Some computer mouses have additional buttons that you can bind to navigate back and forth through your viewed notes.
Using touchpad
You can use gestures on the touchpad to navigate the history of viewed notes.
<div class="ui warning message"> The feature relies on the Electron's <a href="https://www.electronjs.org/docs/latest/api/browser-window#event-swipe-macos"><code>swipe</code></a> event which is only available for the macOS. <br><br> If you're a Windows user, check the <a href="#hack-windows-gestures">Hack Windows gestures</a> section. </div>
Depending on the macOS version, you can find the trackpad settings in different places.
macOS Ventura 13.2
- Go to System Settings > Trackpad.
- Select the More Gestures tab.
- Next to the Swipe between pages action, select a gesture from the list. For example, Swipe with Three Fingers.
Use this gesture to navigate via the viewed notes in Inkdrop.
Watch a video showing how to navigate via the viewed notes using a touchpad on macOS.
<video controls playsInline muted> <source src="https://site-cdn.inkdrop.app/docs/manual/navigating-notes_history.mp4" type="video/mp4" /> </video>
Hack Windows gestures
By default, navigating through notes using touchpad on Windows machines isn't supported. Check out a workaround for Windows 11:
- Go to Bluetooth & devices > Touchpad > Advanced gestures.
- Expand the Configure three-finger gestures.
- For the Swipe left gesture:
3.1. Select Custom shortcut from the list of actions.
3.2. Click Start recording and use the Alt + ← keyboard shortcut.
3.3. Click Stop recording. - For the Swipe right gesture:
4.1. Select Custom shortcut from the list of actions.
4.2. Click Start recording and use the Alt + → keyboard shortcut.
4.3. Click Stop recording.
Now, you can use 3-fingers swipes left and right to go back and forth via the viewed notes.
Note that this workaround doesn't break browser navigation with the gestures.
Set custom keyboard shortcuts
You can set custom keyboard shortcuts for navigation through the visited notes. The commands for the navigation are:
- <a href="/manual/list-of-commands#corenavigate-back"><code>core:navigate-back</code></a>: To go to the previous note.
- <a href="/manual/list-of-commands#corenavigate-forward"><code>core:navigate-forward</code></a>: To go to the next note.
Settings and preferences
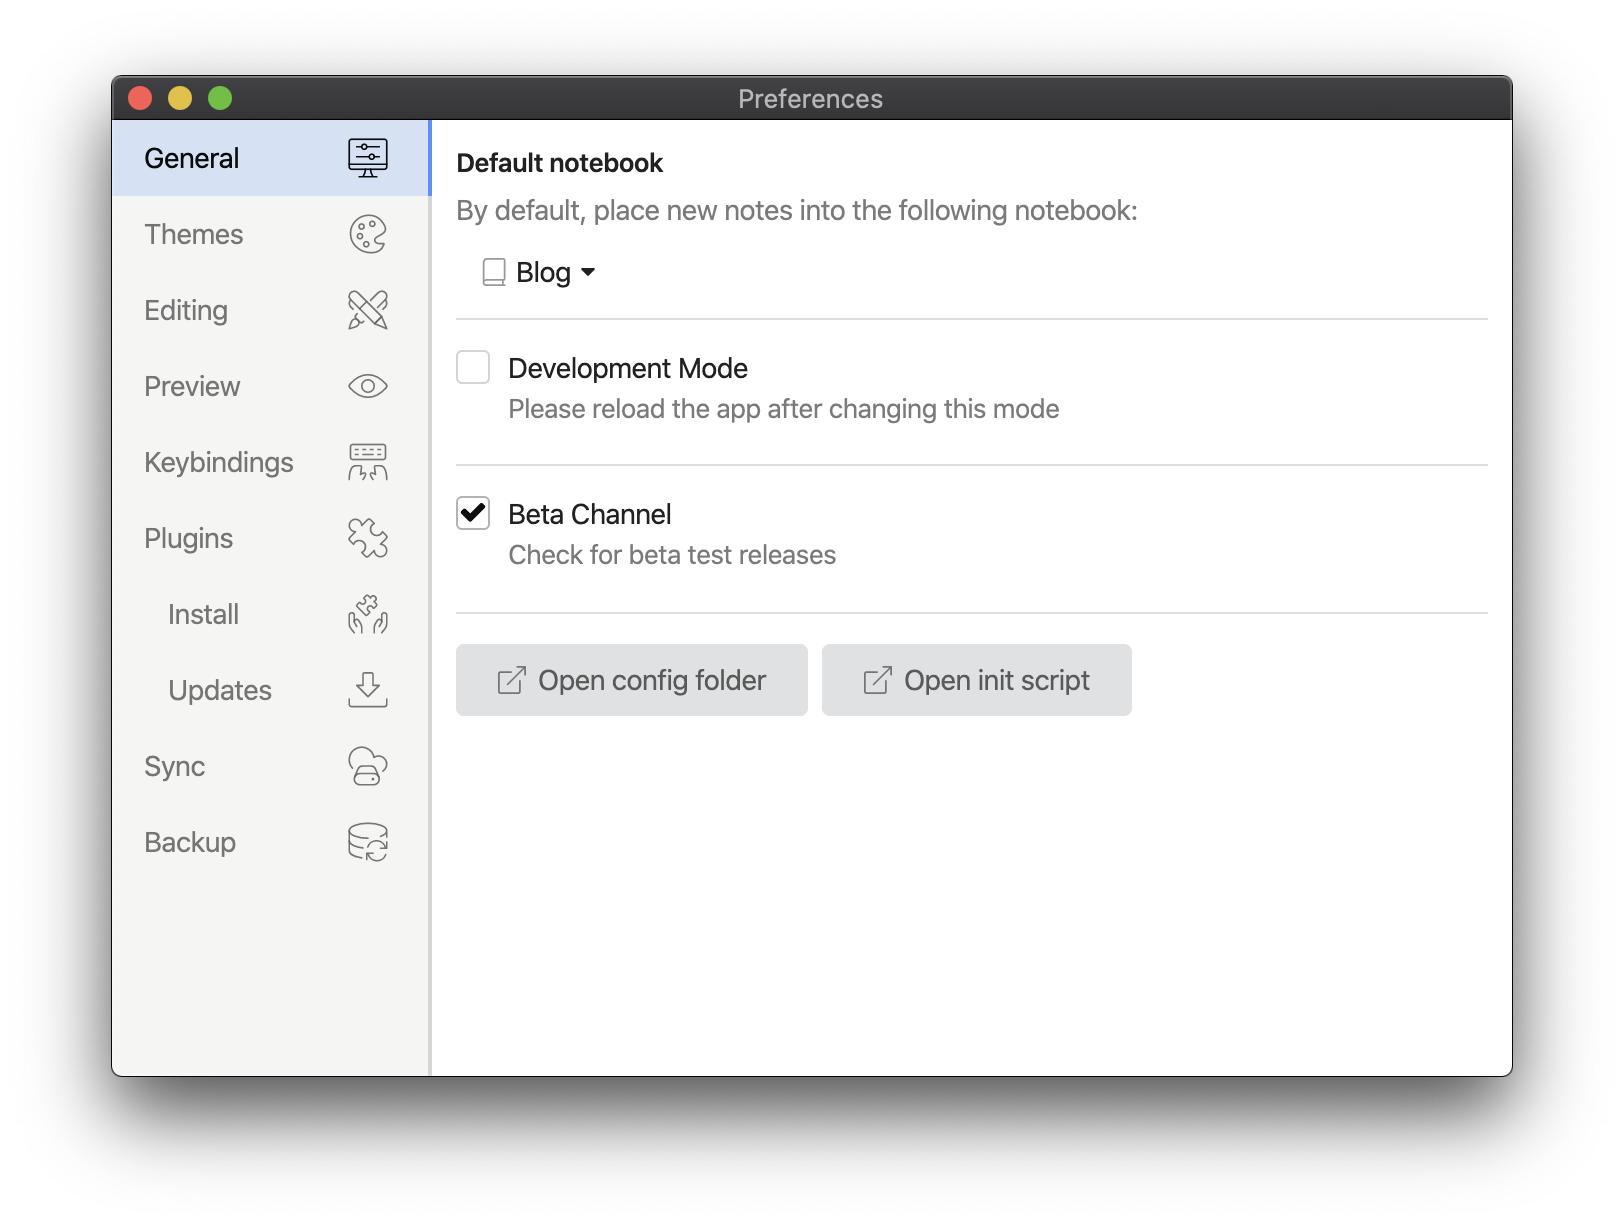
Inkdrop has the Preferences view where you can fine-tune look and feel of the app. To open the Preferences view, take the following steps:
macOS
Go to Inkdrop > Preferences in the menu bar. Alternatively, you can use the Command+, shortcut.
Windows and Linux
Go to File > Settings in the menu bar. Alternatively, you can use the Ctrl+, shortcut.
And you will see the window like this:
